Monday 21 August 2017

Making Space

There's never enough space in the workroom!

Make an Inspirational display

Things get moved to enable me to find something or work on a new project and the materials are all mixed up again.

   I have thought of a way to make space and decorate my work room at the same time.
I  have some chrome grid panels that are usually used to display items for sale at craft fairs and other events. In semi-retirement they are rarely used and have been hanging on hooks from the ceiling of my workshop. I have decided to make use of them. The grids are now on one side of my workshop and have skeins of yarn hanging on them, adding colour to my workspace instead of being stored in plastic boxes on shelves.

Hopefully, the colours will provide inspiration for new projects, a reminder that they exist and even ways to make use of all these handspun and hand dyed yarns that I have created over the past ..?  years.


I also have a large pinboard next to where the skeins are hanging and I have made a 'collage' of fabrics, sample skeins and pictures that  I have collected over the years, some from Association WSD calendars, others from magazines or my own photos.

Monday 14 August 2017

WHICH HEDDLE? - Rigid Heddle or 4 shaft looms -Calculating warp and weft


      Many more people are beginning to weave thanks to the new rigid heddle/knitters looms. Great, attractive pieces are being woven by beginner weavers and I think this is wonderful! I have enjoyed the craft for many years but previously rigid heddle looms were not as attractive or portable as they are now and the implication was that you need to use specialised weaving yarns to produce anything worthwhile. That is certainly not so and the choice of yarns is extensive and inspiring.
But one factor in the success of a project can still be overlooked and that is the use of the correct heddle for the project and result required. Most yarns are expensive and it is a shame to waste yarn and your time, as well as being so disappointed that you never want to weave again, as happened to a friend of mine just a few months ago!
      I am happy to say that she has resumed weaving and is making successful progress.


       Some time ago I damaged one of my tape measures but I chose not to throw it away! I soon found a use for it. While I was sorting through my stash of woollen weaving yarns I decided to store them according to their character and thickness. I stapled lengths onto pieces of card and wrapped each yarn around a 2" length, at the same time as recording  the number of wraps per inch on the card I wrote, where available, the manufactures yarn specification.Wrap the yarn so each wrap lays side by side with the one before, without cramming or over crowding each other.

      To be most accurate it is a good idea to do this over a 2" length.

      The Shetland style yarn samples above which wrap 20 times to the inch.  If they were to be woven with each other as warp stripes or one warp and weft in a typical plain/tabby weave (over one under one, over one under one, all the way across the warp,) would be suitable for a 10 dent (threads per inch) heddle whether on a Rigid Heddle loom or one with multiple shafts.That is half the number of wraps per inch
The reason for this calculation is that the space between the warp threads is the diameter of the weft yarn and so gives it room so it doesn't distort the woven cloth.
It also means that the weaver should be passing the shuttle of weft yarn 10 times from side to side to produce one inch of woven fabric, thus creating a 'balanced' cloth where, on the face of the fabric the length of each yarn, warp and/or weft, showing on the surface will be the same. Look at any plain weave cloth and this should be the case.

      In short, if you are using the same yarn warp and weft on a rigid heddle loom, or for a 'tabby' weave on a shaft loom, to get a balanced weave structure:-
a yarn that wraps 24 times to cover an inch needs the warp to have 12 threads per inch and be woven with a 12 dent heddle (reed on a shaft loom).
24 wraps per inch = 12 dent heddle
20 wraps per inch = 10 dent heddle
16 wraps per inch = 8 dent heddle
15 wraps per inch = 7.5 heddle, and so on.

If you intend to use one yarn for the warp and something different for the weft, it is best to wrap them both alternately, as shown on the next sample.


    When using the brown as the warp with a thicker, slightly slubby yarn for the weft further wraps had to be produced to be sure of success in the woven fabric. The photo here shows that 8 brown warp ends to the inch would be appropriate for a tabby weave. Using 2 different yarns or colours of the same yarn alternately makes the task of counting the wraps per inch for the warp much easier. (It can be frustrating when you lose count and have to do it over again!)

      In fact I decided to weave a twill cloth with brown warp and lighter tweedy weft. In a regular twill weave the weft passes through the warp after 2 threads/ends. This means calculations are slightly different. Two wraps of warp yarn are followed by one of the weft. As you can see from the photograph this meant I needed 12 wraps/ends of brown shetland per inch width of cloth. A 12 dent heddle was needed for this cloth.


Balanced Tabby Weave 

      The following examples are woven in Tabby - over and under alternate threads. The red is handspun wool yarn used both warp and weft. The following 2 are wild silk, both using the same unplied wild silk yarn. The checks were created with a warp, two threads of each colour in turn in both warp and weft. The third sample is log cabin. ( See my blog article - PREPARING TO WARP YOUR LOOM also 'The Next Steps.') I think you can see that the weaves are balanced.


What does this mean to the weaver planning a project? 
      If the space between warps threads is too great the weft yarn beats down to cover more of the warp than expected and the weft yarn will dominate the cloth rather than it being balanced, showing warp and weft yarns equally. Also, more weft yarn will be needed to complete the length of cloth!

      This is the yarn for my latest project, still on the loom.

       The photograph shows that the warp yarn is much thinner than the weft but the finished fabric will still be a balanced twill - hopefully! Watch this space.


Monday 3 July 2017

Oldest Loom Still Working


        On holiday in Totnes, Devon, last year we saw an old loom through the museum window. Sadly, the museum wasn't open that day.
        This year I was able to visit the museum and look more closely at the ancient loom, believed to be the oldest still around and 'working'.
         From the year 1600 or thereabouts, the wood is black and it's age shows in the gnarled surface but the loom can still be operated - with care. With only 2 shafts it would have been used to weave the simplest of cloth.
   

         I was interested to see that the reed had been constructed to allow double the number of selvedge threads to be threaded individually, although, the reed is not  the same width as the maximum possible for the size of loom.


     The other thing that caught my attention was the eyelets in the heddles. They are quite thick, made of metal, fixed to the heddle frame with cord.
The museum had interesting information on the Totnes wool trade which 'developed early and by 1253 its 'russet' manufacture provided a cover for the King's bed. Export trade expanded with the development of 'straights', a poor cloth made from short coarse wool not good enough for the standard English broadcloth. In tudor times merchants turned to the manufacture of 'kerseys' of much better quality.' Dyes became more varied, to the reds and russets made from madder, browns and reds from lichens, three shades of blue were added using woad.
   Merchants arranged the distribution of wool to the spinners and weavers were employed working in their own homes. Fulling (finishing) of the cloth was done by 'tuckers' in their little mills. To remove loose material and secure an even surface, the cloth was stretched on tenterhooks. This was done in public places to avoid trickery in increasing the yardage.
   By about 1700, serges were the chief fabrics produced in Devon but the great days of the Devon cloth trade were already on the decline which was hastened by the use of machinery.'
   This information has prompted me to research the terms used - straights, kerseys, tuckers. I will post more of this later, I hope.


Tuesday 20 June 2017

Weaving with Alpaca


 First attempts at Weaving with Alpaca


              Some time ago I was contacted by Jo, a lady who keeps alpacas, to say that she had some cones of alpaca yarn that Bedfordshire Guild of Weavers, Spinners and Dyers might be interested in.
I went to look at the boxes, 15 in all, of yarn on cones. It was so obviously weaving yarn and in six colours and two thicknesses, the bulk being singles yarn.
              I made contact with the groups from the Association WSD in counties around Bedfordshire and managed to sell approximately 50% of the cones. People were thrilled to get the chance to use alpaca yarn at such a reasonable price. Most of the photos in the montage are of fabrics or scarves woven by Cambridge guild members and they show some of the diverse colour and weave patterns that can achieved without having a multi shaft loom.

              As soon as I had the chance to set up my floor loom I wove fabric with the plied yarn (centre picture) intended for a garden rug. One that I could hopefully sit on without the discomfort of being irritated because my skin does not like wool. I also set up my 8 shaft table loom with a sample point twill weave warp from the singles. (Sample  bottom centre). When both were completed I did as always had been my habit and put the fabric in the washing machine on a 30deg. wool wash. The singles sample came out fine but the plied yarn fabric was shedding and my utility room floor looked as though we'd had a snow storm!
              Worried about having passed on so much of this yarn to friends and acquaintances I contacted members of Cambridge Guild. They were concerned about my results but those who had already woven with the yarn, mainly the singles, had hand washed the fabric without detrimental effects. I was relieved because I saw myself dolling out refunds! To date, only one person has asked for a refund because one of her yarns was shredding in her rigid heddle loom heddles.

Sunday 26 February 2017

Hand spun Self striping Yarn

Handspun Socks

If you are a spinner and sock knitter, then why not combine the two?

Planning your project.

1. First, choose your fibre, pure wool, wool and synthetic fibre blend, or man-made vegetable fibre. There are several appropriate fibres from which to choose. Each has their merits. My samples are 75% merino or wool and 25% nylon.

Taking a close look at sock yarn shows it to be quite round and have many twists per inch. These features ensure long lasting, even wear with little pilling but the yarn is still fairly ‘lofty’ and comfortably soft. Un-dyed yarn bought for the purpose of dyeing may not at first seem as ‘nice’ as commercial yarns but it ‘fulls’ and softens in the dyeing and washing process, as does hand-spun. Both will shrink a little in length.

2. Spin your yarn. You will need to decide whether you are to make one large skein of 100g or 2 of 50g. I would suggest two of the same weight, to be dyed in the same sequence so they match.

If you prefer woollen spun from the fleece you may find a breed that makes good sock yarn without any added supplementary fibre. Or, you may decide to add a synthetic fibre to increase the wear and life of your yarn. In this case, to produce a yarn that wears evenly depends upon the careful measurement of proportions of each fibre in the rolags.
I spun 2 50g skeins of semi-worsted 2 ply yarn with 9 twists per inch and 9 wraps per inch. (See pic. blue and brown socks)


            Once spun,  as I used commercial tops and intended to dye with acid dyes, scouring was not necessary.

            3. Tension swatch. When the yarn was dry and wound into centre pull balls I knitted a tension square. After 3 trials I decided that 3.25mm needles gave me the fabric I wanted with 24 sts in 4” width; 6 sts per inch.


            4. Sock tube trial. As the widest part of me foot is 9” round I cast 54 sts on 3 dpns and knitted a circular sampler to try around my foot. The first was too big, so I reduced the number of stitches by 10% and tried again – success.

            To calculate the length of yarn needed for each row of socks. After the cast on and one row of knitting I marked the yarn at the beginning of the next row by tying in a short length of another yarn. Then I knitted 20 rows and marked the yarn again. After which I undid the knitting, measured the length of yarn taken for 20 rows and divided by 20 to give me the length of yarn needed for each row. This helped me to find the correct distance apart to put the skeining posts. (See previous blog for skeining & dyeing instructions.)

          
             I realise that there may be some difference when the yarn has been dyed but I'm not sure how one can make allowances for this!

             Once the above calculations had been made, again, the big decisions, dye colours to use, width of stripes - all equal or varying?

        I’m not exactly sure how much yarn is used in the heel of a sock so I wasn’t sure how far the hand-spun yarn would go so I decided to knit them toe up, because the length of the leg section was not so important to me.


The finished socks


Gauntlets for a friend.


Thursday 23 February 2017


Striped Sock Yarn Using a Skeining Board

            There are many attractive self-striping yarns in the market place, so many that it can be difficult to choose from the numerous colour ways and stripe patterns. It is interesting and relaxing just to sit and knit, watching the patterns growing on your needles, but for a hand-spinner, what could be even more satisfying and exciting than to choose your fibre mix, spin your own yarn, dye it to produce your chosen pattern in your favourite colour way and ending up with a unique pair of very comfortable footwear.

            I first used this method of creating self striping sock yarn, with very definite, well defined stripes, several years ago. This led me to preparing a workshop for Bedfordshire Guild WSD.

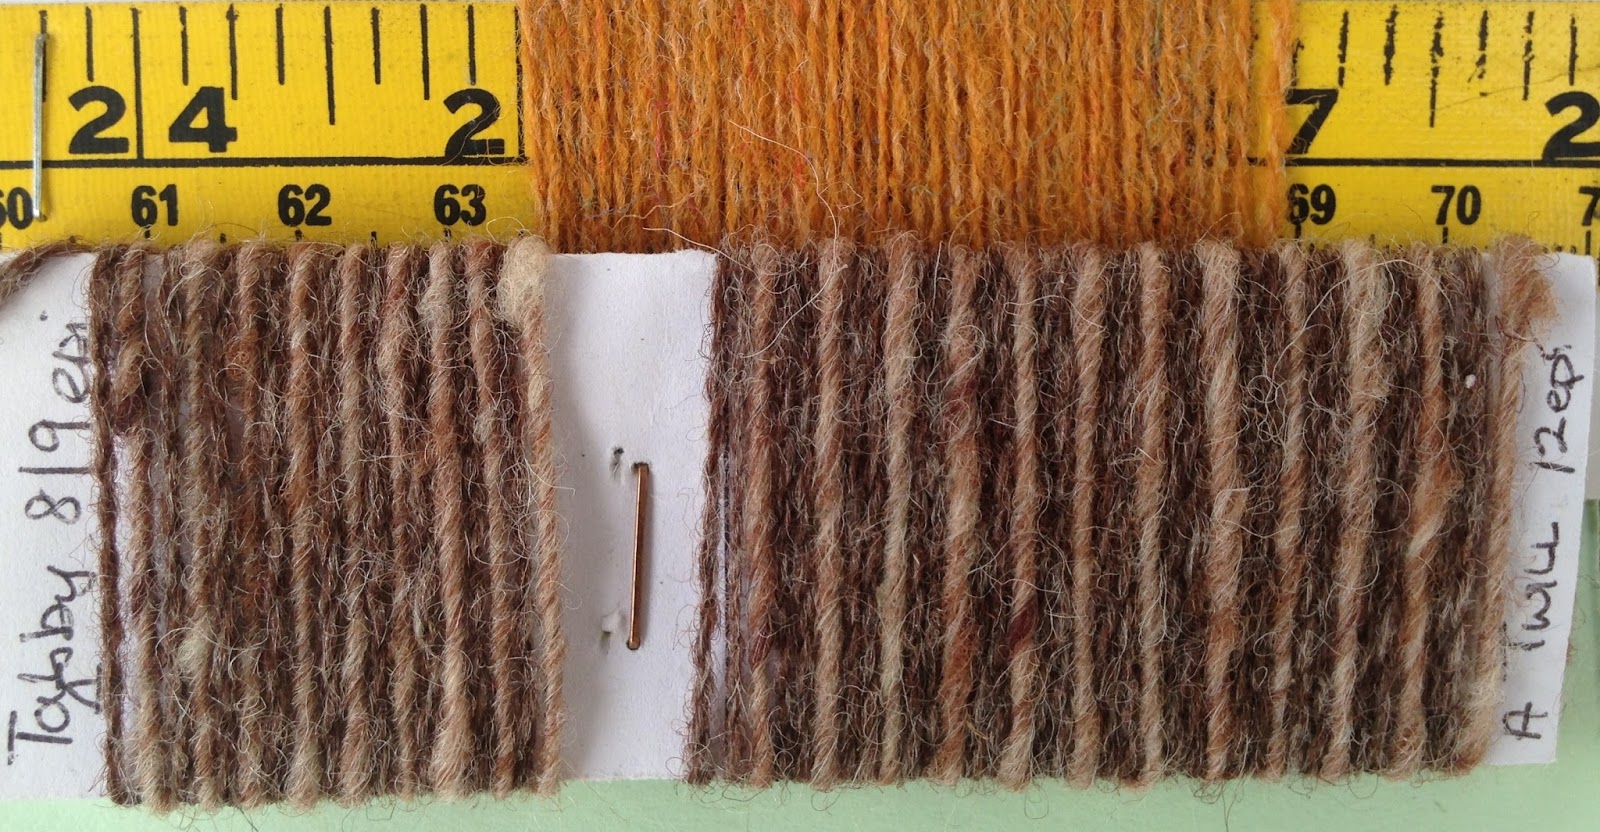
The first, most important, piece of information that I gleaned is that an average sock size – ladies shoe size 6 – takes 30cm of commercial 4ply yarn to knit one row using 2.5/2.75mm needles. Armed with this fact, my husband helped me design and make adjustable skeining boards.
There is now a deal of information and advice online describing methods of producing self striping yarn, but many of them make use of chairs and other pieces of furniture around which the yarn is wound. Some, more sensible, more practical methods use weaver’s warping frames. (See Ashford’s site www.ashford.co.nz).

I have long wondered if a niddy noddy could be used to produce yarn with 2 to 4 stripes.
The Skeining Board

There are three horizontal rows of holes in the board that give the possibility of up to six skeins, each of which begins at one of the six positions in the centre of the board.

Depending on the length of yarn needed to knit one sock row, up to another six posts can be positioned in the relevant positions on the board by being screwed from underneath with longish countersunk screws. The distance between the posts, from skein to skein, is as short as workably possible.

N.B. The length/circumference of a skein is measured around the outside of both posts, not just between the centre points of the post positions.

Now the big decisions…  
a. Colour scheme,
b. Number of colours,
c. Number of stripes,
d. Colour sequence repeat. Is this to be continuous – red, blue, green, red, blue green or mirrored i.e. Red, yellow, blue, green, blue, yellow, red, yellow, blue?
e. Are all the stripes to be the same width?
I find coloured pencils and lined paper useful in planning and making these decisions.

Decisions made, you can get the board ready.

Winding the skeins

            It is a good idea to ‘plan your route’ on the board and whether you want a different number of rows of any colour in your sequence, then it is a good idea to make a note/list of the sequence so you can cross it off as you progress.

            Always start your skeins at a post in the centre of the board. This ensures economic use of the yarn and the shortest distance between skeins.

I start with a slip knot at post A, *, and take the yarn below and around post B anti-clockwise to above post A for skein 1.Then down under C anticlockwise around D to the top of C to make skein 2. Then taking the yarn down below E to F and back to the top of E is gives the pathway for the third skein.
For the next three skeins, the yarn travels from E above G, anticlockwise around H, back to G, up to and around I, over to and under J, back to I and up to and around the top of K, over the top of L and back to K, *, – a complete circuit of 6 skeins.
The next ‘move’ depends on whether you want to repeat the same colour sequence or mirror them.
To continue the same colour sequence, whether or not the number of knitted rows is to be the same, the yarn continues from below K, over to A to repeat the above instructions from * to *
To mirror/reverse your colour sequence, *1, wind the yarn as described above, from * to *, but you then have to wind the yarn completely around the last post, K, taking it to the right of I and wind the next skein clockwise around I and J. After the desired number of circuits/rows you take the yarn down to below G and again wind the skein clockwise. Moving to the right side of the board the next skeins at positions 3, 2 and 1 are wound clockwise and the yarn has to be wound completely around post A, (*2) to repeat the above sequence * to *, followed again by *1 to *2 and so on, until all the yarn is used.

As a weaver, when warping, I am used to putting a length of crossed yarn between each group of threads, depending on the number required in an inch or cm. of warp width. This can be useful when counting the number of rows of sock yarn laid down for each colour. It also helps, after dyeing, to know which way up the skeins should be placed on the posts so they can be easily unwound.

 For my 4 ply yarn, I decided upon a mirrored sequence with 6 colours. I began the skeins at post A, as described above. I continued winding my yarn in this way until it was all used, then tied it off at the nearest post. I repeated the sequence for the second 50g. yarn. Then I tied each skein with figure of eight ties in four places, i.e. at each post and on each side of the skein. I also put ties around the yarn leading from one skein to another. I left the cross ties in place and knotted them loosely.     

 
   Dyeing.
Once the skeins were tied and taken off the board I put them to soak in warm water. When thoroughly wetted, the dyes mixed and work surface prepared, they were squeezed to remove excess water and laid on cling film. Before putting any dye on the skeins I wrapped each one in cling film to protect them from any splashing of unwanted colour. I also used plastic bag grips, on the yarn that ran between skeins, to prevent dye from migrating to adjacent skeins.


            After the acid dye was applied I wrapped them again in a second layer of cling film and steamed them for 45 minutes. Once cooled and rinsed I put the yarn to dry hanging it on a broom handle which went through each skein. When dry I replaced the skeins on the frame to remove the ties and then unwind the yarn. As you can see, the skeins don’t easily go back onto the posts but this can be rectified by moving the outer posts in one position on the board. The cross ties in the centre of the skeins were a useful way of showing whether the skeins are the same way up as before. I also checked that there were no twists between the skeins and, thankfully they unwound easily.

This shows the six colours of 4 ply yarn dyed for the second pair of socks. Again I used acid dyes but either project could have been dyed with natural dye extracts.
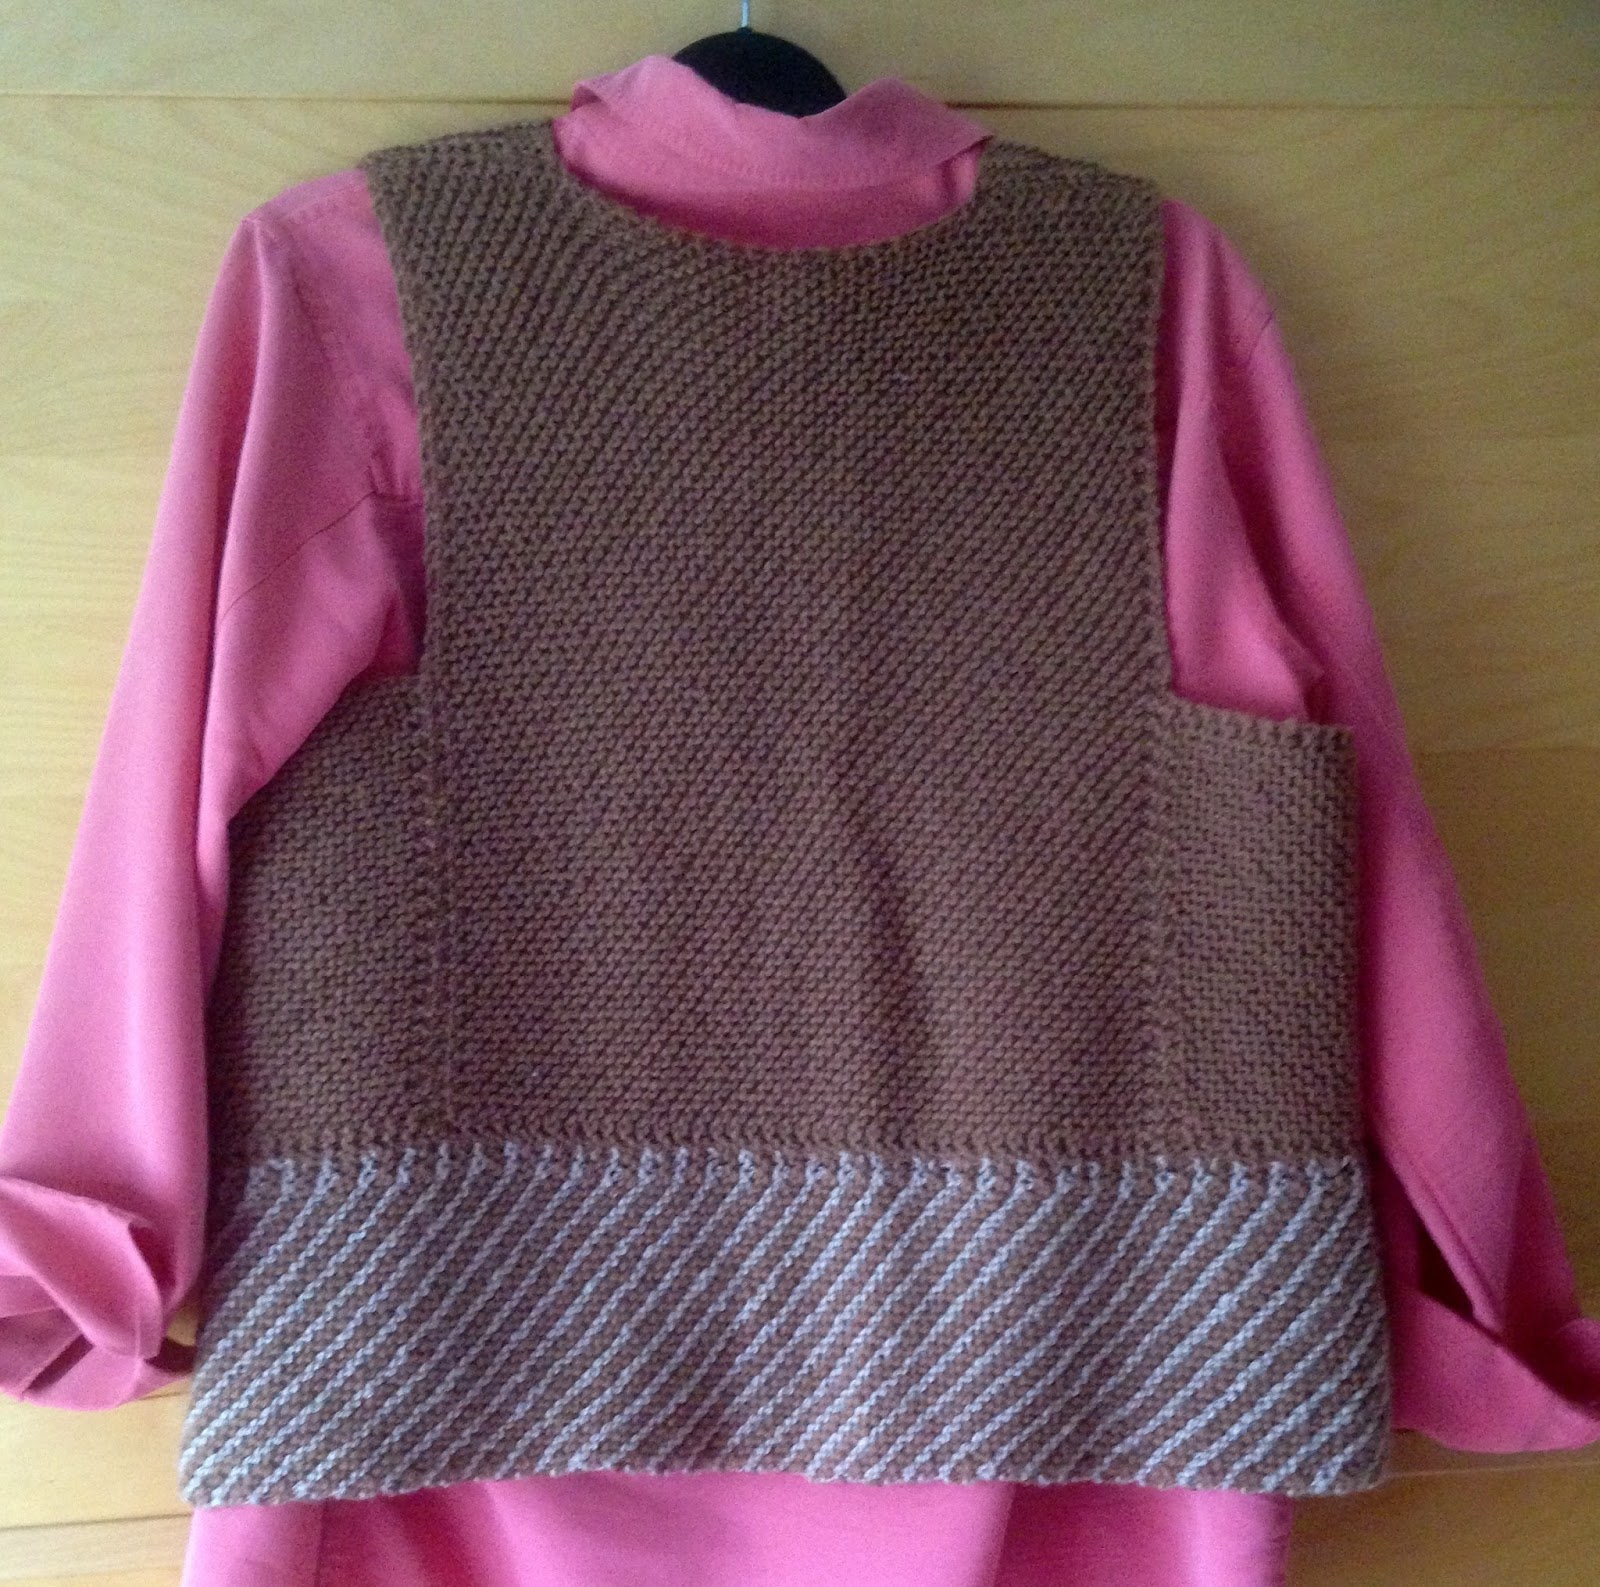
Knitting the socks.
The socks with 4ply yarn  my preferred way of cuff down using the basic ‘Regia’ yarn pattern which can be found at www.coatscrafts.co.uk. The Ashford website – www.ashford.co.nz – also has a basic sock pattern, along with a ‘Spiral Sock Pattern’ and funky pattern for ‘Dreadlock Socks’, all of which are freely downloadable. You can see from the photo that a lace or indeed any textured stitch tends to distort the stripes.
                                  

Tuesday 14 February 2017

Spin to weave project

At last - Spinning to Weave!


        My last post has urged me to begin a long awaited project, making something from my handspun yarn.
        In my 'stash' I had several 100g plaits of a special blend of fibres, 50/50 Silk and wool well blended (5x), ordered from World of Wool over a year ago and hand dyed by myself to sell.
   I had no two plaits alike, but these three had colours in common and it seemed to me that they could be combined for such a project.
   Could I spin it evenly enough, was it to be a singles or plied yarn? How was I going to combine the three colourways?  Decisions, decisions!

    I took the plunge. Spinning on 4 bobbins would give me the option of plying at a later date, should I change my mind on the weight of yarn needed - I had decided to spin a fairly fine worsted type singles and was unsure if I could keep to a consistent diameter.

   First, I gave the fibre time to relax. I undid each plait, held it along its length with hands 12 - 16 inches apart and 'snapped' the length to open it out across its length. Some spinners suggest 'whacking' the tops on a hard/firm surface along its length to do the same thing.
 Each plait was divided into four lengthwise, so giving me 4 x 75g. produced from 25g of each of the original plaits. Fine, that would fit onto my bobbins. Should I decide to ply then this could be done on a larger bobbin.
   I proceeded to divide each 25g across its width into 6 to ensure shorter runs of each shade and to aid drafting. I do believe in pre drafting tops, especially if it has been dyed and you want to spin a consistently fine yarn. You can keep the spinning rhythm going more easily and it also provided you with a much more relaxed experience. Any debris or 'snaggles' of fibre can more easily be picked out at this point!

 
  I soaked and lightly washed all of the skeins together and, after rinsing and wringing out as much water as possible, hung them to dry on a broom handle with a second weighted broom handle through the bottom of all of them to take out some of the kinks. I moved each one regularly to help with drying........
  I have ended up with 4 skeins of singles yarn, each 70-75g and a total of 1800 yards which wraps at 30 ends per inch.

 Sorry, this picture was taken on a sunny day!

Tuesday 31 January 2017

Hand spun, Naturally dyed Waistcoat

Hand Spun, Naturally Dyed Yarn

   The reason I bought a spinning wheel many years ago was to spin yarn for my weaving. Of course it takes time to reach an appropriate standard and along the way I have spun much yarn to use for knitted projects, some of it successful, some not appropriate for the intended finished item, but that's not unusual. There are many factors to take into account to be sure the yarn will behave as you want, and, if you are dyeing the spun yarn, well, that needs thinking about and sampling along the way.
   Spinning became a means to relaxation and a better night's sleep for one such as me, whose thoughts and planning seem to difficult to dismiss, continuing well into the night!
   The result has been many skeins of great yarn with no end product in mind. But they have been worth their weight in restful sleep!
   I am unable to wear most woolen products - being a sensitive soul :-)) - but have discovered that I can find some hope in organically prepared fibres.
   The 3ply yarn for this waistcoat was spun from organic falklands fibre, dyed with Walnuts hulls acquired from a tree in a garden just over the road from where I live. The tree has a preservation order on it along with another that stands in ground that once belonged to Poplar Farm, in Eaton Bray. The occupiers of the two properties are frustrated by the number of husks and nuts that have to be picked up from their gardens and without gloves this is a messy job which results in well stained hands.
   My request for bucketsful of  'walnut debris' was welcomed with some curiosity!
Chemical fixatives are not needed to achieve a permanent colour, so that was another plus for me.
   I was pleased with the shade of brown, deep enough but subtle at the same time.
A tension swatch made me realise that I hadn't dyed enough for a cardigan so I chose a modular knitted waistcoat of my own design.

   I began with the front, and knitted on the diagonal to reduce/eliminate the chance of any sagging, until the piece was long enough to reach the outer shoulder line. I weighed that piece to calculate the weight of yarn needed for the front and back plus side panels and was very close to the weight of dyed yarn. With a slight panic over, this inspired a design opportunity!
   I knitted a band with alternating rows of a silk mix yarn, spun some time ago, with the walnut dyed wool. Hey presto!
   Now, I am looking for a suitable, possibly a bar brooch, to use as a fastening, either at the top or lower down the front.