Monday, 27 June 2016
The warp and weft blog...: The London Cloth Company
The warp and weft blog...: The London Cloth Company: Film by Thomas Webster After observing from afar for awhile with jaw-dropped admiration, I was lucky enough to hear Daniel Harris sp...
RAG WEAVING
CREATIVE USE OF WASTE MATERIALS
There may be a lot of others like me who hate to throw away favourite pieces of clothing that are still beautiful, don't fit any longer or have some small area of damage. Like me these may be part of your 'stash' of creative materials waiting for a new purpose.
Maybe weaving with them is one solution.
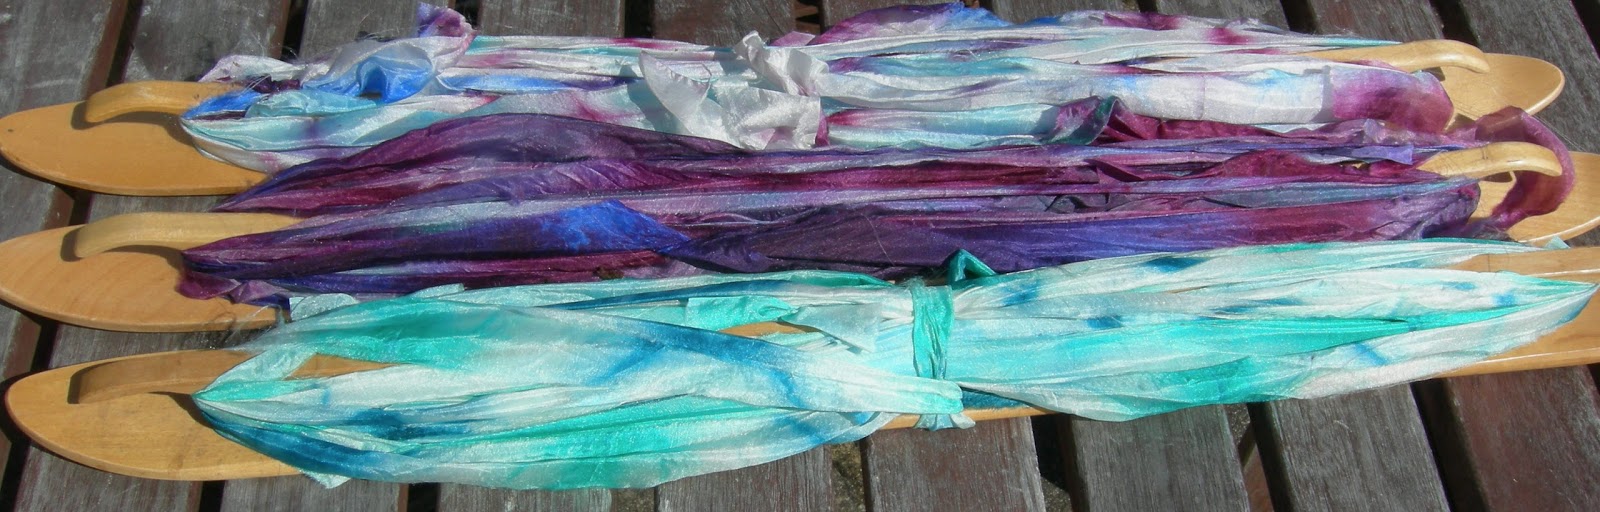
Last year, while demonstrating at 'Living Crafts' Hatfield House, I used some shibori dyed squares of silk which I wove on the remnants of a white silk warp used to demonstrate the previous year.
Visitors were eager to know what I was going to do with this length of cloth, so I quickly thought of an idea and bravely said, 'Come and see the results next year'. Unfortunately I didn't exhibit there this year, but here is the resulting garment.

Below are the silk squares that were cut into continuous strips to give the wound balls on the right.


The Finished Fabric Length:-


The purse, zipped tool bag, on the right, shows how not to use your cut strips!
Made from an old 70's table cloth, I was experimenting with this technique. I tore the strips of fabric and wove with them as they were. the torn edges were not too frayed but I hadn't calculated on the cloth folding inwards/inside out as I wove, so most of what shows is the wrong side of the table cloth and thus not as bright as it could have been. (Tearing does make sure your fabric strips are on the grain.) A lesson learned!
This lined diagram shows how to cut your fabric to get as long a weft 'yarn' as possible.

If you are cutting a thin dress cotton or even printed silk, there is a way to make sure you see the right side of your fabric when it is woven in. Cut the strips a twice as wide as you might otherwise have done and then iron them, wrong sides together, wind them on your shuttle and weave.
The Next Steps
Winding on and Threading Sequence for Log Cabin

Warp wound on, still in the slots only, with just sufficient length to reach the front of your loom, begin to cut the loops in the threads and tie them, as you go, with a slip knot to prevent them being pulled out of the heddle.
Now, you need to concentrate!
Some threads have to be moved from the slots to the holes!
Here is a diagram showing where they should be moved to. If you click on it, it should get bigger!

You will notice that the warp colours alternate for a number of threads and then there are 2 of the same colour in the adjacent slot and hole. This reverses the colour sequence, so when you open a shed, i.e. lift your heddle up, across your warp you will see stripes of one colour and then the other.
When you have completed one repeat, like the one in the diagram you warp will look similar to this next photo.

Work your way across the whole warp, tying your groups with a slip knot as before and check the sequence regularly.
When you are happy with the threading sequence, tie the left and right groups, with a single knot, to the front 'stick' or your warp.

Then continue tying all groups.

Once they are all tied, check that the tension is equal all the way across your warp.
I find pulling the warp groups away from you helps to feel the tension of each group and get the tension equal. When you are happy, lightly tension again, going across the warp tying each group in a bow.

You are now ready to start weaving!
Wind two shuttles, one for each colour, preferably ones that are wider than your warp.
Setting up for Log Cabin on a Rigid Heddle loom
Remembering how to set up your loom can be daunting for the first few times. Wasting precious yarns and making a mistake that takes longer to sort than finishing the whole project, are worries for new weavers.
I hope this blog helps with the setting up for this check fabric design.
This post is for all my friends at the Guild of Long Draw Spinners for whom I am leading a weaving workshop next Saturday 2nd July.
I was feeling very happy with my outdoor photoshoot but then the weather changed and I had to go inside. The photos I took indoors are no where near as good as those outside. I'm sorry, but when you have gone completely through a process like this there is no going back to take more photos. Next time I will check as I go along.
Log cabin is called a block weave and the blocks can be varied in size according to your requirements. usually woven in 2 contrasting coloured yarns the blocks are created by your threading sequence. The 'diagram', 'weave draft' below shows you across the top the order that your yarns need to end up on your loom. the squares on the far right show the order that you pass your shuttles, dark then light in turn through the 'sheds' - created when you move your heddle up then heddle down.

I am endeavouring to show you pictorially how you get to this stage .
'Googleing' 'Log cabin weave' will show you images of the weave structure, but as, in copying and pasting them, I have been warned of problems I cannot show you them here, Please look.
These show typical log cabin fabric woven in 2 contrasting yarns of the same thickness.
The loom I am setting up is a very old Dryad one, given to me by a school I worked at in the 70's. It has a metalex rigid heddle, the only ones available then, with a total of 12 slots and holes to the inch. I find a 4ply yarn just right for this heddle.
Most looms seems to be supplied with a 10 thread per inch heddle and this may be all you have. To create a balanced/evenly woven fabric you will need to use a yarn that wraps 20 threads, touching side by side, over one inch of ruler.


In this case after alternating the colours for a way, I tried threading one colour (pink) in alternate heddle slots, it seemed quicker. Then I began to fill the empty, alternate slots with the grey. It worked well, so I took the grey to the other warp marking in alternate slots, filling in with the pink when I'd finished.

 Tie each colour off with a secure knot.

I hope this blog helps with the setting up for this check fabric design.
This post is for all my friends at the Guild of Long Draw Spinners for whom I am leading a weaving workshop next Saturday 2nd July.
I was feeling very happy with my outdoor photoshoot but then the weather changed and I had to go inside. The photos I took indoors are no where near as good as those outside. I'm sorry, but when you have gone completely through a process like this there is no going back to take more photos. Next time I will check as I go along.
Log cabin is called a block weave and the blocks can be varied in size according to your requirements. usually woven in 2 contrasting coloured yarns the blocks are created by your threading sequence. The 'diagram', 'weave draft' below shows you across the top the order that your yarns need to end up on your loom. the squares on the far right show the order that you pass your shuttles, dark then light in turn through the 'sheds' - created when you move your heddle up then heddle down.
I am endeavouring to show you pictorially how you get to this stage .
These show typical log cabin fabric woven in 2 contrasting yarns of the same thickness.
The loom I am setting up is a very old Dryad one, given to me by a school I worked at in the 70's. It has a metalex rigid heddle, the only ones available then, with a total of 12 slots and holes to the inch. I find a 4ply yarn just right for this heddle.
Most looms seems to be supplied with a 10 thread per inch heddle and this may be all you have. To create a balanced/evenly woven fabric you will need to use a yarn that wraps 20 threads, touching side by side, over one inch of ruler.

I have used both colours of warp thread so they can be easily counted. As you can tell there is still a little room but I have no option but to thread 12 threads per inch with the only heddle I have!
The wraps sample below is DK yarn which wraps 16 thread to the inch, so an 8 dent rigid heddle would be needed.

Gather your equipment.
You will need:-
a surface long enough for your required length of warp - eg. 2 metres.
G clamp or warping post that clamps to the end of your 'table'.
Scissors
Yarns, probably centre pull balls, and a container to control them.
Threading hooks
Brown paper, or something similar, for winding your warp.

I recommend marking your RH in the centre slot and either side to show where your warp threading will begin and end. Her I have marked six inches either side of centre. I leave my centre marking in permanently.

now with heddle marked and loom and yarns in place, you can begin to thread/warp up your loom.
My G clamp is centred at the opposite end of the table to my loom and yarns. The back 'legs' of the loom are hanging over the edge of the table, this keeps it in place while warping, to ensure all threads are the same length.


Each yarn is tied to the back warping stick of your loom in turn and
each colour is threaded through your RH. Here I have threaded the pink/dark colour first, through the marked slot and the looped end placed over the G clamp.
The light colour/grey is then threaded in the same way through the next slot along and 'hung' on the G clamp. You have done this all before but probably with only one yarn at a time.
I usually take the colours in turn, so as not to forget one and keep the colour sequence correct.
 |

 Tie each colour off with a secure knot.
Heddle threaded, it's now time to wind the warp onto the back roller/beam.

If you need a break, either leave the warp on the G clamp or chain it. (I needed to get indoors because rain was threatening proceedings!)
I put a stick/ruler in the last loop of the chain and tightened it to secure.
The loom and warp are now safely portable.
Wind your warp with even tension onto the back of your loom, putting some quality brown paper between the layers of warp.
Now comes the tricky bit....... sequencing the colours to produce the typical log cabin check ....I'll describe it in another post.
Monday, 20 June 2016
Inspiration for Art Yarns

The next Saturday meeting of Bedfordshire Guild of Weavers, Spinners and Dyers is scheduled on July 16th and the topic for the day is Spinning your own 'fancy' yarns.
With this in mind I ransacked my storage boxes to find commercial yarns, bought for inspiration as well as skeins produced at workshops over the years.

The skein of white, bottom right, and the yellow/green/orange above it, along with the three coloured balls, second left, inspired my to spin the yarns top left of the first photo. The blue/green/brown one in the first photo is the remnants of yarn I used to knit a cosy winter
sweater.


Last year, a very generous lady, Monica, showed members of the Guild of Longdraw Spinners how she creates her 'beaded' merino wool necklaces. (Left)
As well as making the slubby necklace yarn, we used a number of 'add ins', feathers, strips of sequins and locks of fleece.
Monday, 13 June 2016
Solar Dyeing

This is the first time I have used Picasa to create a photo collage. I hope it is easier next time!
Over the last two summers I have used flower heads and leaves from our garden, as well as some from friends' to experiment with natural dyeing.
Dyeing the traditional way with dye plants or extracts takes some time. This is perhaps a little more hit and miss but non the less interesting and exciting.
I now grow woad, the leaves of which produced the salmon fibre on the left. A pleasing result!
This summer I have collected eucalyptus leaves (top left) from around Cranleigh School's cricket pitch and I am hoping for a port wine red or rich brown .
More to come on this topic as this years 'gatherings' develop!
Sunday, 12 June 2016
Teddy's Secret Garden.
Again, it's such a long time since I have posted! I nearly forgot that I had a blog at all.

This is my latest project - a fabric collage under our handsome grandson's mid-sleeper.
He is interested in nature and watches creatures very intently, so some of his favourites are on this panel.
 This suspended cushion came first. It is a made from a patchwork or blue and green upholstery fabrics.
Coy? No, just playing hide and seek!
I have two smaller panels to make before the project is complete, one for each end, so watch this space!

This is my latest project - a fabric collage under our handsome grandson's mid-sleeper.
He is interested in nature and watches creatures very intently, so some of his favourites are on this panel.

Coy? No, just playing hide and seek!
I have two smaller panels to make before the project is complete, one for each end, so watch this space!
Subscribe to:
Posts (Atom)